Steps to make ANY printer a wireless printer using Raspberry Pi
- Posted on 11 May 2020
- Posted in DIY Projects
A simple way of bringing your regular USB printer to modern standards without you having to shell out a fortune. In this article, I will be going through the steps on how to set up a Raspberry Pi wireless printer on a Windows 10 PC from scratch.
The actual process of getting the software installed is quite simple; however I've documented some of the additional steps that
needs to be completed in order for a Windows PC to discover and add this printer. Here is the finished product...
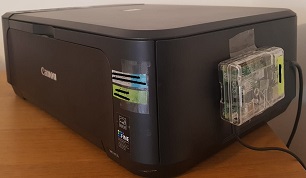
...nothing that a bit of scotch tape can't fix :)
* My equipment list:
- Raspberry Pi and its power supply - I used a Raspberry Pi 1 Model B+ with 512 MB
- WiFi dongle - I needed it for my older Raspberry Pi however WiFi is built in the Raspberry Pi 3 and above
- microSD Card with atleast 8GB capacity - Raspbian minimum requirements
- Monitor and Keyboard - for the intial configuration of Raspberry Pi until we can SSH to the device
- PC - I used a Windows 10 Home PC to connect to the Raspberry Pi wireless printer
- Printer with USB port
I have assumed that you are starting from scratch. In case you already have Raspbian installed on your Raspberry Pi then please jump to Step 4.
1. Prepare the microSD card ready to use with your Raspberry Pi
- I've used the Raspberry Pi Imager for Windows (download) to install Raspbian to my microSD card. For other Raspberry Pi Imager versions, you can visit https://www.raspberrypi.org/downloads/
- Once you have inserted the microSD card into your PC and opened the Raspberry Pi Imager for Windows then you choose the Raspbian with desktop operating system, choose the microSD card, and then choose write; which will then flash the O/S image to the card.
2. Install Raspbian on the Raspberry Pi
- Place the microSD card in the Raspberry Pi and then plug in the WiFi dongle, a keyboard, monitor and the power supply. Now power up the devices.
- Walk through the installation wizard. I strongly recommend that you change the default pi user account password raspberry to something that only you know.
3. Set the Raspberry Pi preferences
-
We need to change the hostname of the Raspberry Pi device and enable SSH.
- Tab to the Application Menu button and hit enter >> move to Preferences button and click it. >> select Raspberry Pi Configuration and hit enter >> then select the System Tab - change the hostname from the default raspberrypi to one of your choice.
- Tab to the Application Menu button and hit enter >> move to Preferences button and click it. >> select Raspberry Pi Configuration and hit enter >> then select the Interfaces Tab - choose enabled for the ssh option.
- Apply changes and reboot Raspberry Pi. Once the Raspberry Pi comes back online we can disconnect the monitor and keyboard from it, as going forward we will connect to this device using SSH from the Windows PC via PuTTY. You can download PuTTY from putty.org or from here.
4. Backup the Raspberry Pi microSD card
-
It is a good practise to back up the Raspberry Pi microSD card from time to time. I used
Win32 Disk Imager which can be downloaded from sourceforge.net or from
here.
- Open Win32 Disk Imager then choose the location and the name of the backup you want to take using the folder icon, and then choose the drive letter for your microSD card.
- Click on the Read button. The microSD card contents will then be backed up to your PC.
- Note: In the event your microSD card contents are corrupted and you need to restore from a backup. Then follow the instructions above but instead of clicking the Read button click on the Write button to write it back to the microSD card.
5. Update the Raspberry Pi
-
Updating your Raspberry Pi is important to receive new features, security updates, installed packages and dependencies
and its required before we progress with the next steps.
- Connect to the Raspberry Pi from your PC using SSH and credentials created in Step 2; then execute the following commands from the Terminal.
-
Retrieve a list of updates that contain all the installed packages and their latest versions.
$ sudo apt-get update -
Install the updates; the yes flag will tell the update process to continue rather than prompting you for each updated package or library.
$ sudo apt-get upgrade --yes -
Reboot the Raspberry Pi for changes to take effect .
$ sudo reboot
6. Install and start CUPS (Common Unix Printing System) on the Raspberry Pi
-
CUPS is a printing system for UNIX like operating systems based computers. It gives computers on which it is running the ability to act as a print server.
A computer running CUPS is able to accept jobs from client devices, process them and pass it on to the appropriate printer to print.
-
Install CUPS.
$ sudo apt-get install cups -
Add your Raspberry Pi username to the CUPS system to create a profile.
$ sudo usermod -a -G lpadmin [pi]
Replace [pi] with your username. -
Start CUPS for the first time
$ sudo /etc/init.d/cups start
7. Configure CUPS and set permissions on the Raspberry Pi
-
Settings that generally affect how CUPS works, can be updated by editing the configuration file.
-
Open the conf file in an editor.
$ sudo nano /etc/cups/cupsd.conf -
Change/add the following lines to the configuration file..
                                                    # Only listen for connections from the local machine.

                                                    #Listen localhost:631

                                                    #CHANGED TO LISTEN TO LOCAL LAN

                                                    Port 631


                                                    # Restrict access to the server...

                                                    <Location />

                                                    Allow @Local

                                                    </Location>


                                                    # Restrict access to the admin pages...

                                                    <Location /admin>

                                                    Allow @Local

                                                    </Location>


                                                    # Restrict access to configuration files...

                                                    <Location /admin/conf>

                                                    Allow @Local

                                                    </Location>
-
After saving, restart CUPS to effect the changes to the configuration file.
$ sudo service cups restart -
Ensure CUPS can be connected to and accessible over all the home network.
$ sudo cupsctl -–remote-any -
Restart CUPS to effect changes.
$ sudo /etc/init.d/cups restart -
Now navigate to the CUPS homepage on your PC browser
https://[myRaspberryPiHostname]:631/
Replace [myRaspberryPiHostname] with your Raspberry Pi hostname.
Ignore the insecure warning since an invalid certificate is used.
8. CUPS - Add a printer
- Now connect the Printer to the USB port of the Raspberry Pi and power on the printer.
- Navigate to the CUPS homepage. When the web interface loads, go to the Administration tab and choose Add Printer. When prompted, enter the Raspberry Pi credentials you set in Step 2.
- Choose your printer (example: Canon MG2100 series in my case) >> then click Continue.
- Set the Printer name, description, location and then enable the option Share this printer >> then click Continue.
- Choose the Make & Model and Add Printer >> then click on the Set Default Options button.
-
Then you will see the Printer added. Make a note of the URL after replacing https with http; we will need this for adding a printer to the PC.
This will resemble something similar to the example below - replace the placeholders with your Raspberry Pi and Printer details.
http://[myRaspberryPiHostname]:631/printers/[myPrinterName] -
We have now created a Raspberry Pi powered print server!
9. Adding the Raspberry Pi powered wireless print server to a PC
-
We should be able to discover and connect to printers on this Raspberry Pi powered print server like any other wireless printer.
Steps 10 to 13 are applicable ONLY if you are using a Windows PC.
10. Enable SMB1 Sharing Protocol on Windows 10
- Go to Control Panel > Programs and select Turn Windows Features On or Off..
- In the features list, scroll down to SMB 1.0/CIFS File Sharing Support.
- Enable the checkbox SMB 1.0/CIFS File Sharing Support and all other child boxes will auto populate. Click OK to accept the changes.
- Click Restart Now to reboot the computer.
11. Enable Internet Printing Protocol (IPP) printing on Windows 10
-
The steps below assume that the printer is already configured and available via CUPS.
- Go to Control Panel > Programs and select Turn Windows Features On or Off..
- In the features list, scroll down to Print and Document Services.
- Enable the checkbox Internet Printing Client. Click OK to accept the changes.
- Click Restart Now to reboot the computer.
12. Setup and configure Samba on the Raspberry Pi
-
Samba is an interoperability tool that allows for easy communication between Windows and Linux or Unix programs
and it will be used to allow our windows based system to communicate with CUPS running on the Raspberry Pi to print.
- SSH to the Raspberry Pi and execute the following commands to install and configure Samba.
-
Ensure that Samba is installed.
$ sudo apt-get install samba
When prompted, choose No to modify smb.conf to use WINS settings from DHCP. -
Open the Samba configuration file and make several edits.
$ sudo nano /etc/samba/smb.conf -
Add or change the following lines and update the [printers] and the [print$] sections.
                                                    # CUPS printing.

                                                    [printers]

                                                    comment = All Printers

                                                    browseable = no

                                                    path = /var/spool/samba

                                                    printable = yes

                                                    guest ok = yes

                                                    read only = yes

                                                    create mask = 0700


                                                    # Windows clients look for this share name as a source of downloadable

                                                    # printer drivers

                                                    [print$]

                                                    comment = Printer Drivers

                                                    path = /var/lib/samba/printers

                                                    browseable = yes

                                                    read only = no

                                                    guest ok = no
-
Restart Samba to get it to load the updated configuration.
$ sudo systemctl restart smbd
13. Add the newly created network printer on your Windows PC
- Go to Devices and Printers >> click on Add a printer >> then click on Next >> then select the printer I want isn’t listed on the next page.
-
Choose the option Select a shared printer by name and enter the CUPS printer URL from Step 8
http://[myRaspberryPiHostname]:631/printers/[myPrinterName]
As before, replace the placeholders with your Raspberry Pi and Printer details. - Click the Next button. Choose your printer manufacturer and printer series. In my case it was Canon and Canon MG2100 series. Then click the OK button. The printer will get added to your list of Network printers and give you the option to print a test page.
- You should now be able to print via a Raspberry Pi network printer from your Windows PC.
Great Job
And there you go; you now have wireless network printer. Enjoy!!!
Addendum:
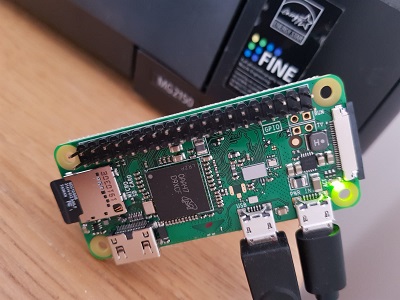
** 17 June 2020: Replaced my Raspberry Pi with a Raspberry Pi Zero WH